
You’ve invested a significant amount of time creating persuasive copy for your product or service, not to mention the money spent on running ads. Finally, you secure a customer interested in making a purchase. They add items to their cart, proceed to checkout, and encounter payment issues. All the effort you put into converting these potential customers has been wasted, and you just lost a potential customer who will never return.
If customers can’t make payments smoothly on your WordPress website, what’s the point of being in business, right?
Research from Statista indicates that 30% of customers might leave if they have to re-enter credit card information. You need a fail-safe checkout system to accept payments on your WordPress website. This blog post is designed to guide you on how to accept payments on WordPress. Let’s collect these payments.
Choosing a Payment Gateway for WordPress
The first step in accept payments on WordPress is to connect a payment gateway to your website. A payment gateway adds a form to your checkout page. Customers will provide payment information on this form to be able to check out. There are so many payment gateways to choose from. A good number may not be a good suit for your website and maybe the type of services you offer. Here’s what you should consider before choosing a payment gateway:
1. Location
Some payment processors may accept payments from certain countries only. For example, if your target market is India, a specific payment gateway may only accept cards from the US. So you need to consider the location of your business when accepting WordPress payments. In the case of the example provided above, for accepting payments in India, consider Razorpay.
2. Cost
Payment processors may often likely charge you a processing fee. These fees can come in the form of a percentage charged on each transaction, a flat fee per transaction, or a monthly fee. Your decision should align with your business model. The typical and widely used pricing is the percentage per transaction. However, if you sell high-priced items, we recommend choosing a flat fee, as it is a better option.
3. Merchant Account
If you already have a merchant account, it’s a good idea to consider using a gateway from the same provider. Why? Because it avoids the inconvenience of managing payments across different accounts.
4. Support for Woocommerce Subscriptions
If you charge recurring fees for services like gym membership, we recommend using a Woocommerce subscription. But there are only a few payment gateways that work with WooCommerce Subscriptions. Refer to this WooCommerce Subscriptions documentation to see which features each gateway supports.
Installing and Setting Up Payment Plugin
With a few things to consider before choosing a plugin, let us begin installing and setting up our payment plugin. As mentioned earlier, WordPress doesn’t come with a payment gateway by default. Luckily, there are tons of plugins to choose from.
We will go with WooCommerce for this demonstration. This will be a simple step-by-step guide. You should be able to follow along.
Step 1. Installing the Woocommerce Plugin
Visit your WordPress dashboard and click on ‘Plugins’. Select ‘Add New’ next, and search for ‘Woocommerce.’ Click ‘Install Now’ and ‘Activate’ when it’s done.
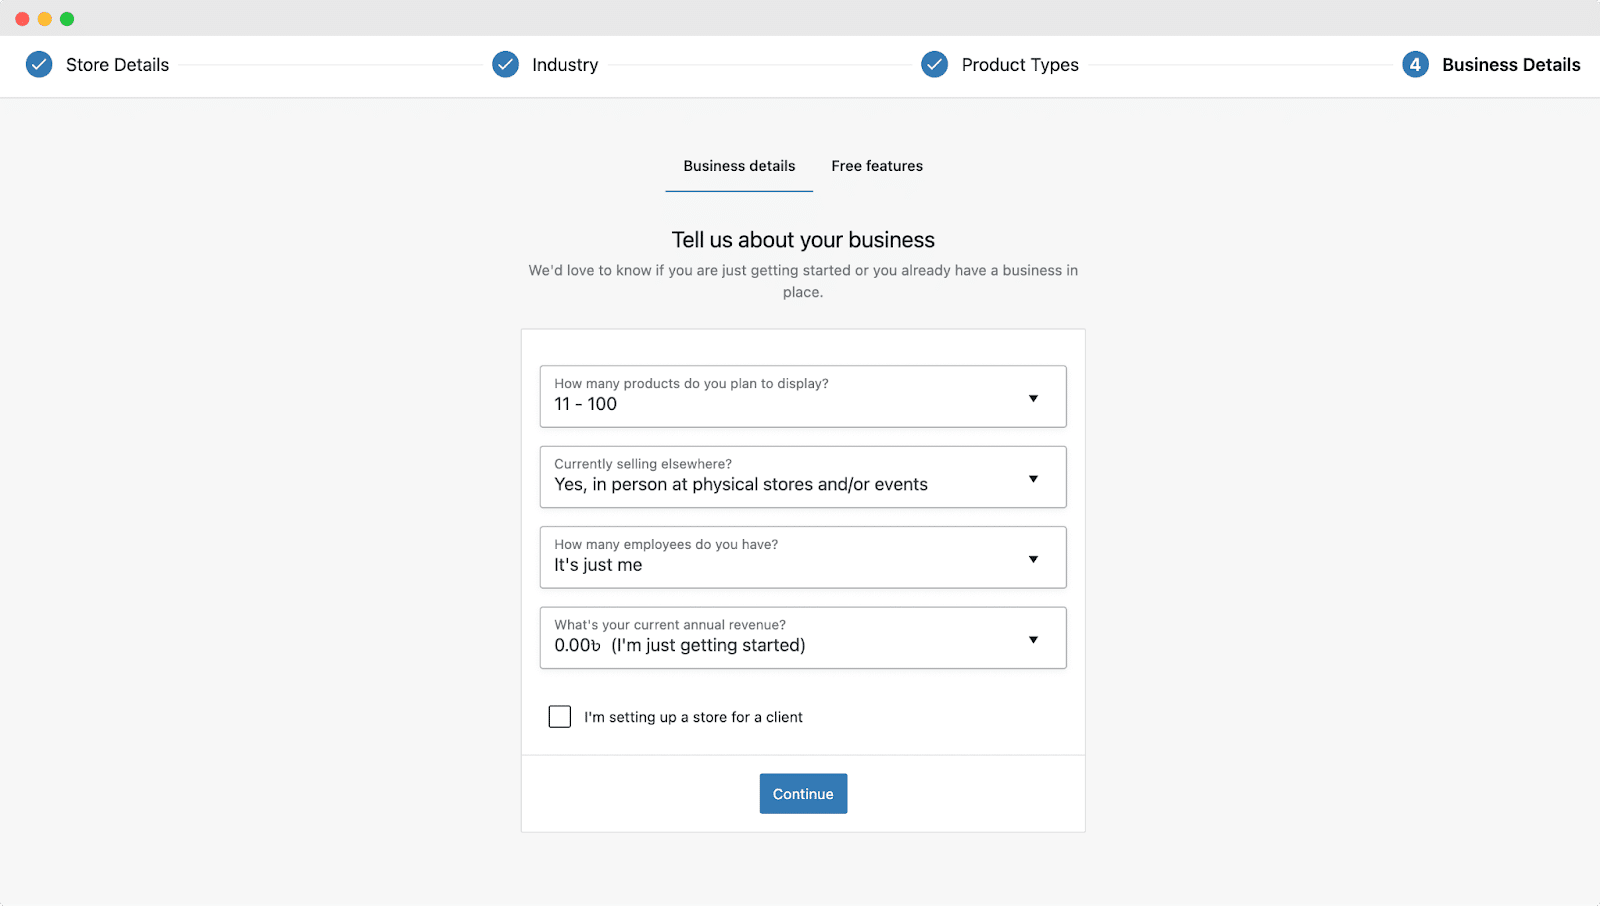
Step 2. Configure WooCommerce Setup Wizard
After you have activated the plugin, you will be redirected to the Woocommerce Setup Wizard. Fill out important information about your business, like how many products you plan to display, how many employees you have, shipping, and tax information.
3. Choose a Payment Method
The next thing to do in the setup wizard is to choose a payment method. Woocommerce supports gateways like Stripe and PayPal. It’s not limited to these two only, I must add. There are a variety to choose from.
That’s it. Your payment plugin has been integrated. But there is one more tutorial before we wrap up. Creating payment forms. Let’s do this.
Creating Payment Forms
As a business, you may need an easy way to accept payments on your website without setting up a complex shopping cart. A simple payment form to allow you to accept custom payment amounts, set up recurring payments, and collect custom details with ease. Stripe helps with this. To create a payment form with WooCommerce using Stripe as an example, follow this process:
Step 1. Install the Stripe Plugin
Search ‘Stripe’ in ‘Add Plugins.’ Install and activate the ‘WooCommerce Stripe Payment Gateway plugin.

Step 2. Get API Keys from Stripe
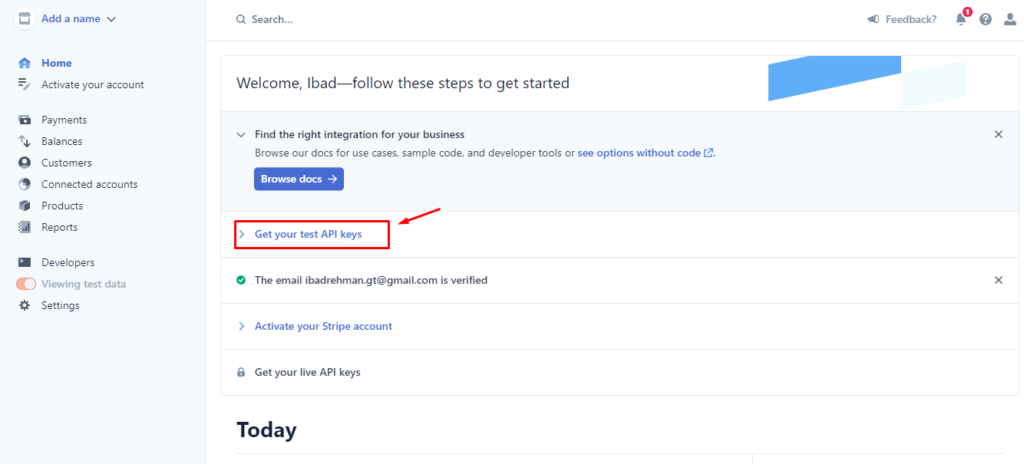
In the next step, you’ll need your Stripe API keys to integrate the Stripe WordPress plugin. Here’s how to get them:
- Log in to your Stripe dashboard.
- Navigate to the “Get Your API keys” section.
- Copy and save the Publishable and Secret Key for the next step.
Step 3. Configure Settings
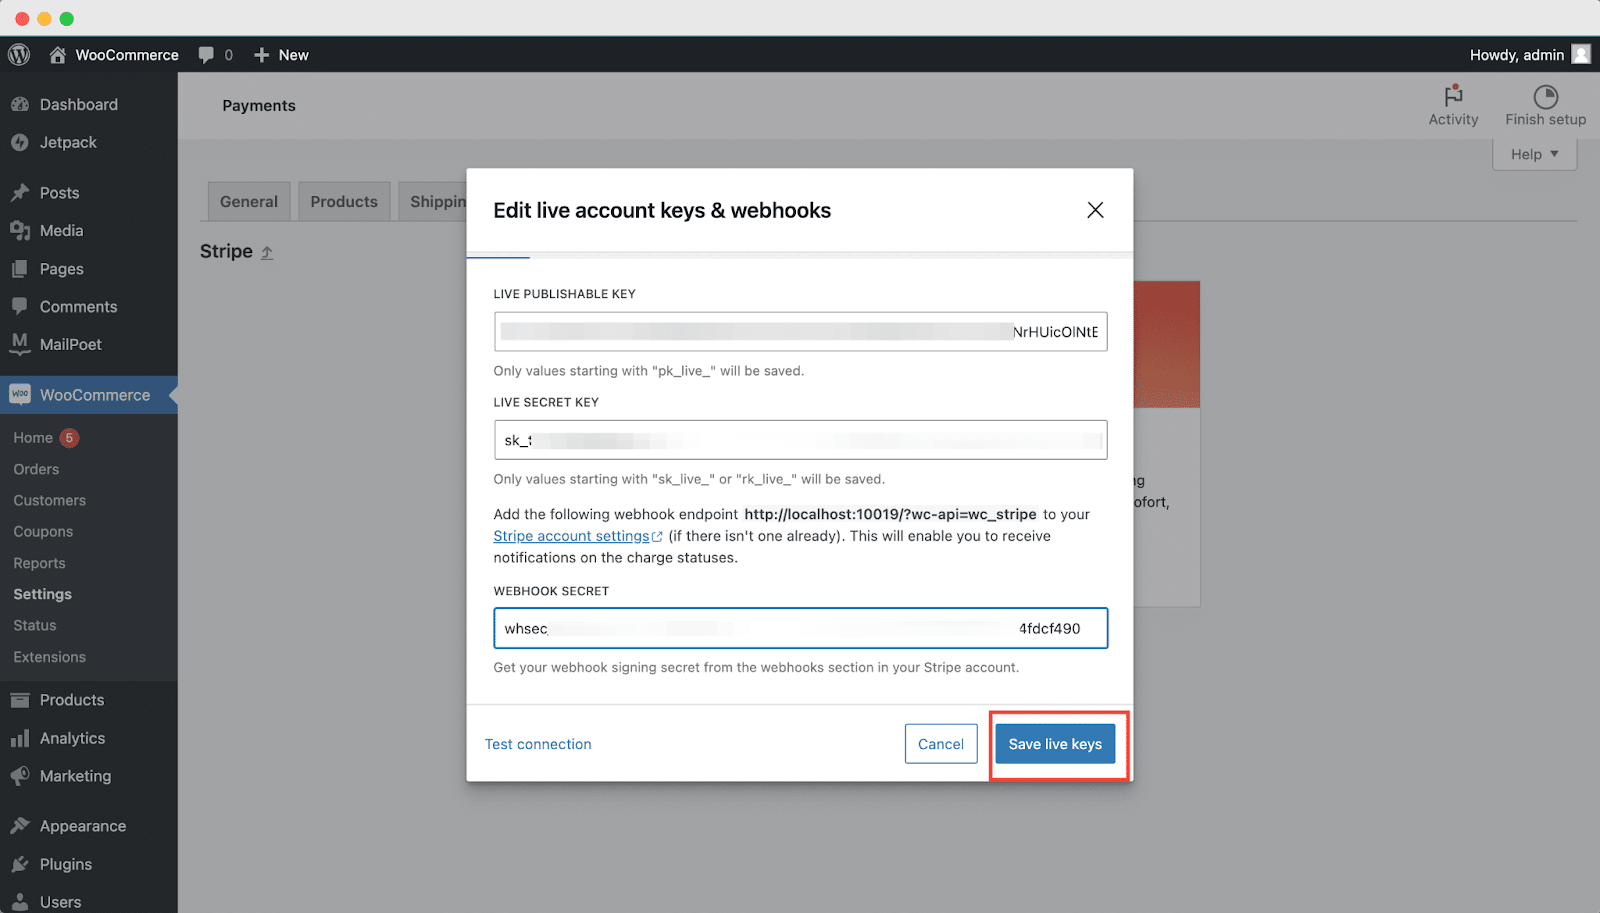
Navigate to ‘WooCommerce’ > ‘Settings’ > ‘Payments.’ You’ll see your installed gateways (Stripe for this example). Toggle the Stripe button to activate it. Click on ‘Enter Account Keys’ next to enter your API credentials and configure the settings.
Add your Stripe Publishable and Secret Keys and click the ‘Save Live Keys’ button. Your Stripe payment is now set up.
Step 4. Enable the Gateway
Remember to check the ‘Enable’ box to enable the stripe payment gateway. Save changes after that has been done.
Step 5. Test the Stripe Plugin
Next, we should test our Stripe plugin integration to ensure our form works well. Add a product to your store and proceed to the checkout. You will find options to pay with credit and debit cards. At the bottom, there is an indicates it is in testing mode. It also offers a testing card to simulate the payment process.
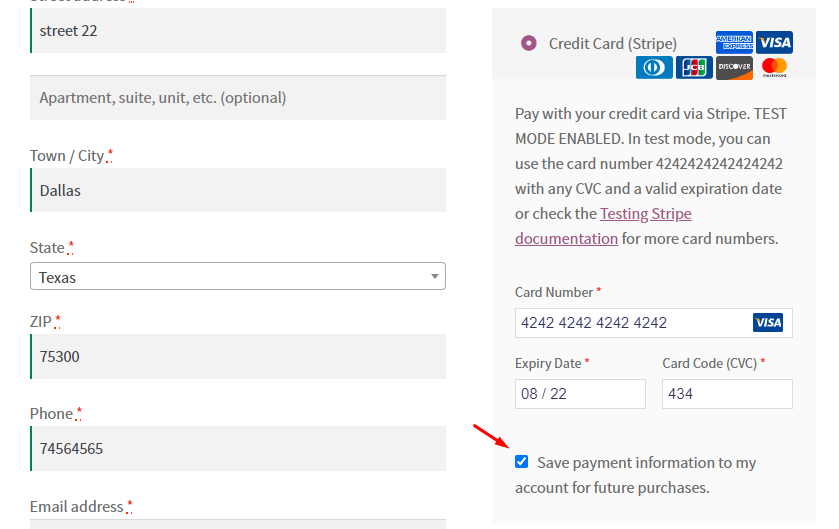
Pay for the product with your testing card. You can check the ‘save payment information’ box to save the testing card information for another use.
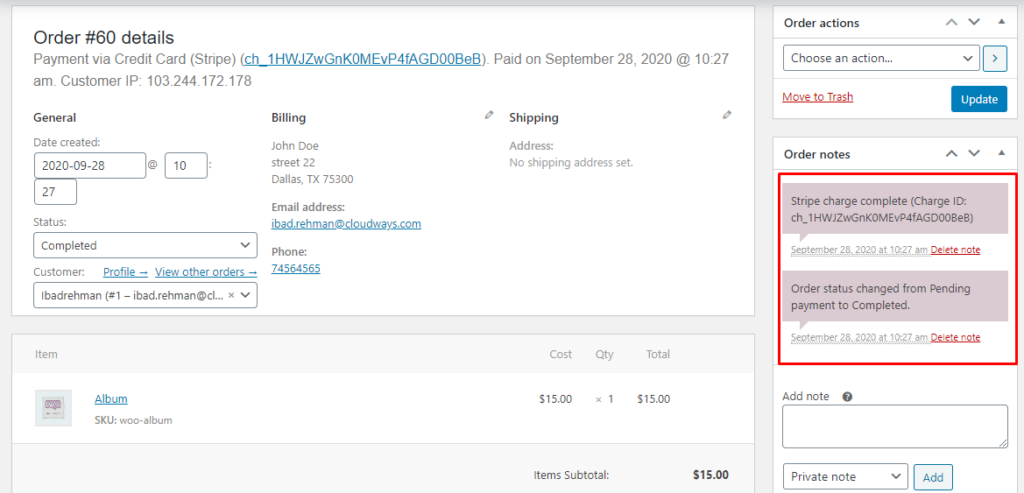
Step 6. Order Confirmation
You will receive a receipt confirming that your order has been placed successfully. In WooCommerce > Orders, you will also see the payment details and transaction ID for reference.

To switch from testing to live mode, navigate to the plugin’s settings and deactivate the Test Mode.
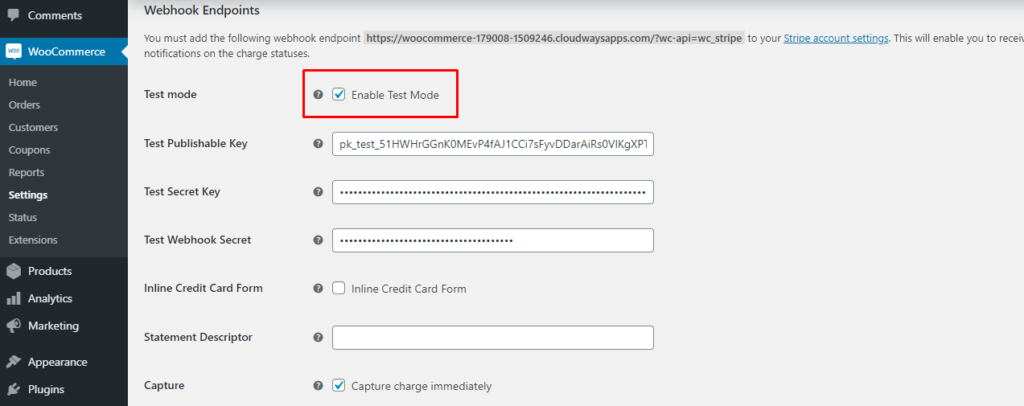
Update the test and secret keys with LIVE keys.
Troubleshooting Common Issues
You may encounter common integration issues while integrating a payment gateway into your WordPress website. Here’s how to resolve a few of such issues:
1. Check Plugin Settings:
Start by revisiting the settings of your payment plugin. Ensure that the payment gateway credentials are correctly entered. Confirm the currency settings and verify that the plugin is enabled.
2. Test with Sandbox Mode:
If your payment gateway supports it, switch to sandbox or test mode. This allows you to simulate transactions without actual money changing hands. Verify if transactions work in this mode, helping you isolate the issue.
3. Update Plugin and WordPress Version:
Ensure that both your payment plugin and WordPress core are up to date. Outdated software can lead to compatibility issues and may cause payment failures.
4. Check SSL Certificate:
Confirm that your website has a valid SSL certificate. Payment gateways often require a secure connection (HTTPS) to process transactions. If your site is not secure, payments may be rejected.
5. Reach Out to Support:
If all else fails, don’t hesitate to contact the support teams of both your payment gateway and the plugin developer. Provide detailed information about the issue, including error messages and steps to reproduce the problem.
Conclusion
We hope that this guide has been helpful to you. You should have considered a payment gateway that aligns with your business by now or at least know what to look out for.
The step-by-step instructions for integrating the payment gateway have been clear, though we recognize that it may involve some technical aspects. It’s perfectly fine if you find it challenging to follow.
Frequently Asked Questions
Q: Can I accept credit card payments on my WordPress website?
Yes, you can. Most payment plugins integrate with major credit card payment gateways like Stripe and PayPal. Simply connect your chosen gateway in the plugin settings to enable credit card payments on your site.
Q: What should I do if a customer faces payment issues on my site?
If a customer encounters payment issues, ask them to double-check their payment details. If the problem persists, review the transaction logs in your payment plugin for error messages. Contact the plugins or the payment gateway’s support for assistance if needed.
Q: Do I need coding skills to accept payments on my WordPress site?
No, you don’t need coding skills. Payment plugins for WordPress are designed to be user-friendly and usually come with intuitive interfaces. You can easily set up and customize payment forms using the plugin’s built-in features.


Leave A Comment